Modular Kitchen Working Drawings in AutoCAD: A Complete Practical Guide
Introduction
Modular kitchen working drawings in AutoCAD are essential for converting an interior design concept into detailed technical information that cabinet manufacturers, carpenters, installers, electricians and plumbers can understand.
A beautiful modular kitchen design is not complete with just a 3D image. The project also requires accurate floor plans, cabinet elevations, sections, dimensions, appliance locations, material specifications and installation details.
AutoCAD is widely used for preparing these 2D interior working drawings. It helps interior designers organize measurements, represent individual cabinets, create furniture details and prepare professional drawing sheets.
For students and aspiring interior designers searching for AutoCAD interior design training in Yelahanka, modular kitchen design courses in Bangalore or interior drafting classes near me, this guide explains the complete drawing workflow.
Whether you are designing a small apartment kitchen or a larger residential kitchen in Bengaluru, understanding technical drawings will help you communicate your design more accurately.
1. What Are Modular Kitchen Working Drawings?
Modular kitchen working drawings are detailed technical drawings that communicate how a kitchen is arranged, constructed and installed.
They translate the approved interior design into information that can be used for fabrication, procurement and site execution.
A typical modular kitchen drawing package includes:
- Kitchen floor plan
- Furniture layout
- Dimensioned cabinet layout
- Base cabinet elevations
- Wall cabinet elevations
- Tall-unit elevations
- Kitchen sections
- Modular cabinet details
- Shutter and drawer details
- Countertop details
- Backsplash details
- Electrical and lighting layouts
- Plumbing layouts
- Appliance locations
- Material and finish schedules
- Hardware schedules
Each drawing has a specific purpose.
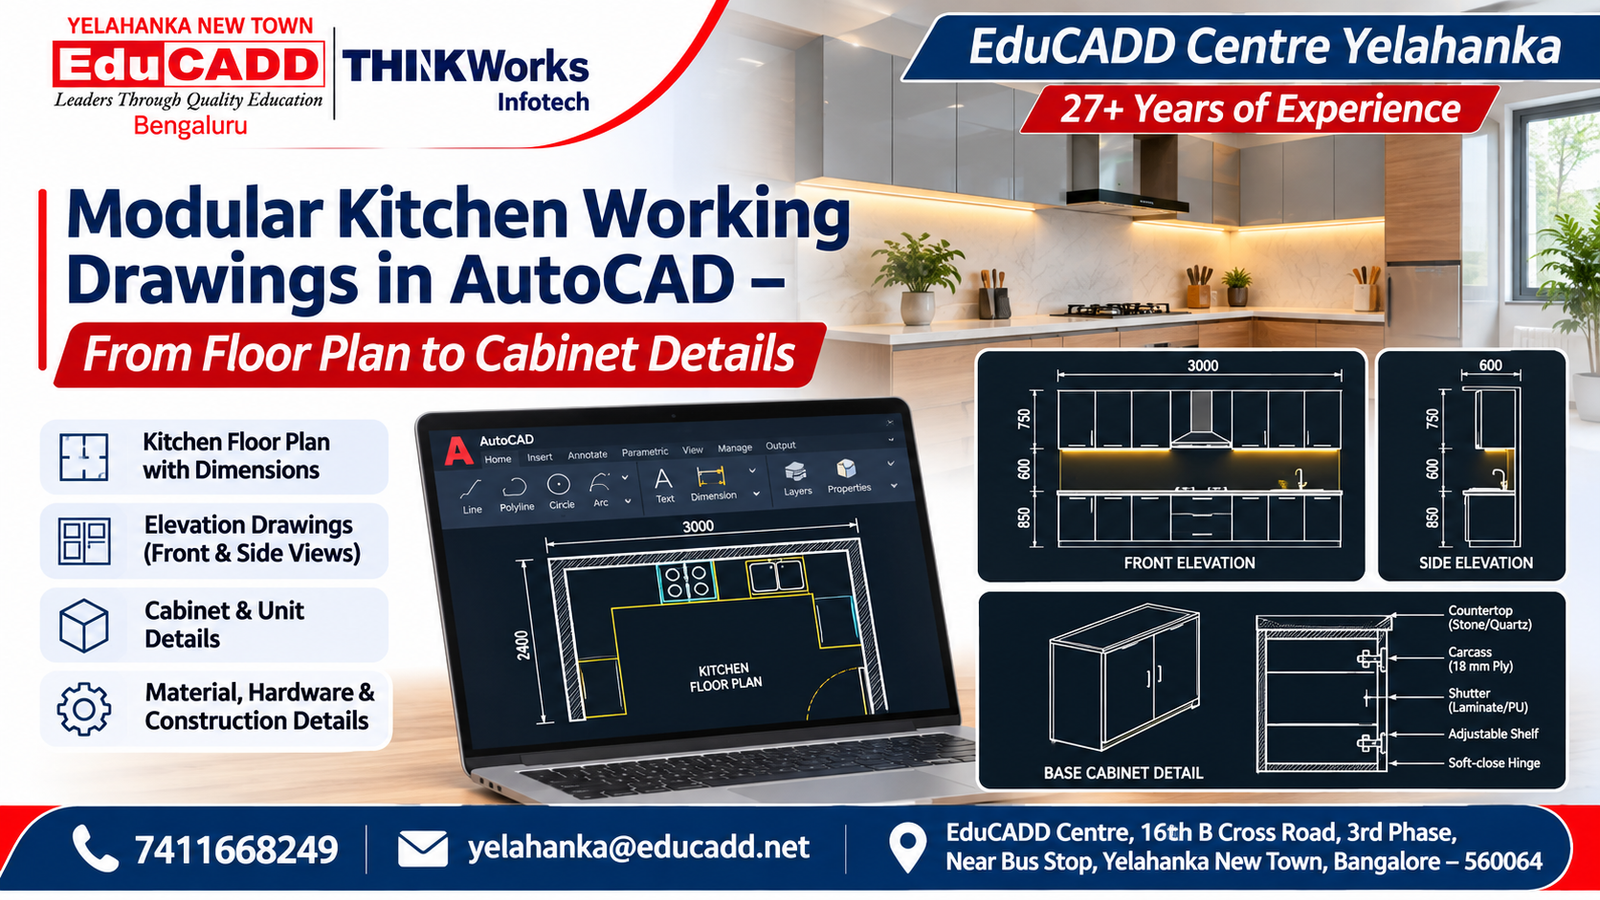
For example, a floor plan communicates the horizontal arrangement of kitchen components, while an elevation communicates the height, width and arrangement of cabinets on a particular wall.
Sections and enlarged details explain construction information that cannot be communicated clearly through a general floor plan.
2. Difference Between a Kitchen Concept Design and Working Drawing
Understanding this difference is important for interior design students.
A. Concept Design
A concept design communicates the overall appearance and design direction.
It may include:
- Colour combinations
- Design themes
- Material references
- Furniture arrangement
- Mood boards
- 3D visualization
- Reference images
The main objective is to communicate the design idea.
B. Interior Working Drawing
A working drawing provides technical information for executing the design.
It includes:
- Accurate dimensions
- Cabinet identification
- Elevations
- Sections
- Material specifications
- Hardware details
- Appliance clearances
- Service locations
- Installation references
A 3D rendering may show how a kitchen will look, but it does not necessarily communicate the exact construction information needed by a carpenter.
A professional interior project needs both design presentation and accurate technical documentation.
3. Information Required Before Preparing Kitchen Drawings
Before opening AutoCAD, collect the necessary project information.
1. Site Measurements
Visit the site and measure:
- Overall kitchen length
- Overall kitchen width
- Floor-to-ceiling height
- Wall thickness, where relevant
- Door openings
- Window openings
- Window sill levels
- Beam and column positions
- Floor-level differences
- Existing wall obstructions
Do not rely only on an old architectural floor plan. Verify the actual site dimensions.
2. Plumbing Information
Identify:
- Water inlet position
- Drainage outlet
- Sink location
- Dishwasher connection, if required
- Water purifier location
- Plumbing access requirements
Any relocation of plumbing services should be coordinated with the relevant site professionals.
3. Electrical Information
Collect details about:
- Refrigerator power point
- Microwave connection
- Oven connection
- Hob ignition or electrical requirement
- Chimney power point
- Dishwasher connection
- General kitchen sockets
- Under-cabinet lighting
- Ceiling lighting
Electrical points and appliance connections should be coordinated with qualified electrical professionals and the equipment manufacturer’s requirements.
4. Appliance Specifications
Identify the selected or proposed appliances.
Examples include:
- Refrigerator
- Built-in oven
- Microwave
- Dishwasher
- Cooking hob
- Chimney
- Water purifier
Check the actual product dimensions, ventilation requirements, access requirements and manufacturer installation instructions.
5. Client Requirements
Discuss the client’s preferences:
- Number of storage units
- Drawer requirements
- Pantry requirements
- Open shelves
- Cutlery storage
- Waste segregation
- Corner-unit requirements
- Appliance preferences
- Material and finish preferences
This information helps develop a practical kitchen layout.
4. Understanding Different Modular Kitchen Layouts
Before preparing working drawings, select a suitable kitchen layout.
A. Straight Kitchen
A straight kitchen places the main kitchen components along one wall.
It may be suitable for compact apartments and smaller kitchen spaces.
Typical components include:
- Base cabinets
- Wall cabinets
- Sink
- Cooking hob
- Refrigerator
- Countertop
B. L-Shaped Kitchen
An L-shaped kitchen uses two adjoining walls.
It can provide useful work and storage areas while keeping the central floor area relatively open.
Typical components include:
- Corner cabinet
- Sink unit
- Drawer unit
- Cooking hob unit
- Wall cabinets
- Refrigerator or tall storage
C. U-Shaped Kitchen
A U-shaped kitchen uses three connected sides.
It may provide more countertop and storage space, depending on the available room dimensions.
The designer must carefully check the central circulation space and cabinet-door operation.
D. Parallel Kitchen
A parallel kitchen contains two opposing cabinet runs.
It is often used where the room layout allows two working sides.
The clear distance between the cabinet runs must be checked for comfortable circulation, appliance operation and safe movement.
E. Island Kitchen
An island kitchen includes a separate central unit.
Depending on the design, the island may contain:
- Additional storage
- Preparation counter
- Seating
- Cooking equipment
- Sink
The island requires sufficient circulation space and proper coordination of any services that need to reach it.
The most appropriate layout depends on actual room dimensions, user requirements, appliances and building constraints.
5. Modular Kitchen Working Drawings in AutoCAD: Step-by-Step Workflow
Let’s understand the complete process through a hypothetical L-shaped residential kitchen project.
Assume the kitchen has two adjoining walls measuring approximately 3000 mm and 2400 mm.
These dimensions are illustrative project inputs, not standard kitchen dimensions.
Step 1: Create the Kitchen Base Plan
Open AutoCAD and start a new drawing.
Set the drawing units to millimetres.
Create the base architectural plan using the verified site measurements.
Draw:
- Kitchen walls
- Door openings
- Window openings
- Columns
- Structural obstructions
- Plumbing reference points
- Existing electrical points
Keep the architectural reference separate from the proposed furniture layout.
Step 2: Create and Organize Layers
A properly organized drawing makes editing and printing easier.
Suggested layers include:
| Layer name | Purpose |
|---|---|
| A-WALL | Existing walls |
| A-OPENING | Doors and windows |
| I-CABINET | Cabinet outlines |
| I-COUNTER | Countertop |
| I-APPLIANCE | Kitchen appliances |
| I-FURNITURE | Furniture |
| I-DIMENSION | Dimensions |
| I-TEXT | Text and annotations |
| I-HATCH | Material hatches |
| I-PLUMBING | Plumbing references |
| I-ELECTRICAL | Electrical references |
These are suggested project-specific names, not mandatory industry layer codes.
Autodesk explains how layers help organize drawing objects by function, control visibility and maintain drawing standards in its official AutoCAD Layer Management Guide.
Step 3: Prepare the Kitchen Furniture Layout
Draw the proposed kitchen cabinet arrangement in plan view.
Identify:
- Sink unit
- Cooking unit
- Drawer unit
- Refrigerator
- Pantry
- Tall storage
- Corner unit
- Wall cabinet arrangement
Check the relationship between the refrigerator, sink and cooking area.
Consider the user’s working habits, movement patterns, available counter space and access to storage.
Do not finalize the layout only on the basis of visual appearance.
Step 4: Plan Base Cabinets
Base cabinets form the lower storage and countertop system.
Typical modules include:
- Sink cabinet
- Drawer cabinet
- Hob cabinet
- Storage cabinet
- Corner cabinet
- Pull-out cabinet
Represent each cabinet clearly in the kitchen plan.
Identify the cabinet number and relevant dimensions.
Step 5: Plan Wall Cabinets
Wall cabinets provide additional storage above the countertop.
Plan:
- Cabinet width
- Cabinet height
- Cabinet depth
- Shelf arrangement
- Shutter opening
- Hood clearance
- Window clearance
- Lighting requirements
The final cabinet arrangement should be coordinated with the actual ceiling height, appliance specifications and user requirements.
Step 6: Plan Tall Units
Tall units may accommodate:
- Pantry storage
- Built-in oven
- Microwave
- Broom storage
- Refrigerator
- Utility storage
Check appliance dimensions and ventilation requirements before finalizing the tall-unit design.
Step 7: Prepare the Kitchen Floor Plan
The floor plan should clearly show the cabinet arrangement and its relationship with the room.
Include:
- Wall dimensions
- Cabinet dimensions
- Cabinet identification marks
- Sink location
- Hob location
- Refrigerator location
- Appliance references
- Door and window locations
- Countertop outline
- Important clearances
The floor plan becomes the reference drawing for the elevations and sections.
6. How to Prepare Modular Kitchen Elevations in AutoCAD
Kitchen elevations are among the most important working drawings.
They show the cabinet arrangement when viewed directly from the front.
For an L-shaped kitchen, prepare separate elevations for both cabinet runs.
A. Base Cabinet Elevation
Show:
- Base cabinet width
- Cabinet height
- Shutter divisions
- Drawer arrangement
- Plinth
- Countertop
- Sink position
- Hob position
- Appliance openings
B. Wall Cabinet Elevation
Show:
- Wall cabinet width
- Cabinet height
- Shutter divisions
- Shelf arrangement
- Chimney position
- Open shelves
- Under-cabinet lighting, if applicable
C. Tall Cabinet Elevation
Show:
- Full-height cabinet
- Refrigerator space
- Oven space
- Microwave space
- Pantry shelves
- Storage divisions
D. Dimensioning
Add:
- Overall wall width
- Individual cabinet widths
- Cabinet heights
- Countertop level
- Wall cabinet position
- Appliance opening dimensions
- Important vertical references
Use a consistent dimension style.
Refer to the official Autodesk AutoCAD Dimensioning Guide for dimension types and drafting practices.
7. How to Prepare Kitchen Sections and Detailed Drawings
Sections provide information that cannot always be communicated through elevations.
Prepare sections through important kitchen components.
1. Countertop Section
Show:
- Countertop thickness
- Supporting cabinet
- Edge profile
- Backsplash arrangement
- Wall finish
- Relevant fixing details
2. Base Cabinet Section
Show:
- Cabinet carcass
- Internal shelves
- Drawer arrangement
- Shutter thickness
- Hinges or drawer hardware
- Plinth
- Countertop support
3. Wall Cabinet Section
Show:
- Cabinet depth
- Shelf arrangement
- Back panel
- Mounting system
- Shutter arrangement
- Relevant fixing information
4. Sink Cabinet Section
Show:
- Sink position
- Plumbing access
- Waste connection space
- Water supply arrangement
- Storage restrictions
- Service access
5. Tall Unit Section
Show:
- Internal shelves
- Appliance openings
- Ventilation provisions
- Appliance access
- Storage divisions
The actual construction details should be coordinated with the selected materials, hardware and appliance installation requirements.
8. Modular Kitchen Cabinet Schedule and Hardware Schedule
A cabinet schedule helps identify individual modules in the project.
It also helps the designer and manufacturer coordinate the proposed furniture arrangement.
Sample Cabinet Schedule
The following is a hypothetical educational example.
| Cabinet ID | Cabinet type | Width | Depth |
|---|---|---|---|
| B-01 | Sink base unit | 900 mm | 560 mm |
| B-02 | Drawer base unit | 600 mm | 560 mm |
| B-03 | Hob base unit | 900 mm | 560 mm |
| W-01 | Wall cabinet | 900 mm | 350 mm |
| W-02 | Wall cabinet | 600 mm | 350 mm |
| T-01 | Tall storage unit | 600 mm | 600 mm |
These are illustrative module dimensions only. They are not universal recommendations. Actual carcass dimensions, external dimensions, finished depths and heights depend on the design, material thickness, hardware, countertop, plinth and appliance specifications.
Important Cabinet Schedule Fields
A detailed cabinet schedule may contain:
- Cabinet ID
- Cabinet type
- Width
- Height
- Depth
- Carcass material
- Shutter material
- Finish
- Edge banding specification
- Hardware reference
- Remarks
Hardware Schedule
A separate hardware schedule may include:
- Hinges
- Drawer runners
- Soft-close systems
- Lift-up mechanisms
- Pull-out baskets
- Corner fittings
- Handles
- Drawer organizers
For manufacturer-specific cabinet fitting planning, refer to the official Blum Cabinet Configurator. It provides tools for visualizing cabinets, selecting fittings and preparing planning and manufacturing information.
The final hardware selection must be checked against the specific product’s technical and installation requirements.
9. Electrical and Plumbing Coordination in Modular Kitchen Drawings
A modular kitchen drawing should not be prepared independently of the building services.
Electrical and plumbing requirements need to be considered before cabinet fabrication.
Electrical Layout
Show the proposed locations of:
- Refrigerator power point
- Microwave connection
- Oven connection
- Dishwasher connection
- Chimney connection
- Hob-related electrical connection
- General-purpose sockets
- Under-cabinet lighting
- Ceiling lights
Coordinate socket positions with cabinet shutters, appliances, splashbacks and service access.
Electrical circuits, load requirements, protection and final connections must be checked by qualified electrical professionals.
Plumbing Layout
Show:
- Sink location
- Water supply points
- Drainage connection
- Water purifier connection
- Dishwasher connection, if required
- Service access
Ensure that the plumbing arrangement does not conflict with drawers, shelves and cabinet fittings.
Chimney and Ventilation Coordination
Check:
- Chimney position
- Duct route, where applicable
- Exhaust outlet
- Ceiling obstructions
- Access for maintenance
The selected equipment manufacturer’s installation instructions should guide the final arrangement.
10. How to Create Reusable Cabinet Blocks in AutoCAD
Modular kitchens often contain repeated cabinet sizes and furniture components.
Instead of drawing the same geometry repeatedly, designers can create reusable blocks.
Examples include:
- Base cabinet blocks
- Wall cabinet blocks
- Drawer blocks
- Refrigerator blocks
- Hob blocks
- Sink blocks
- Furniture blocks
- Hardware symbols
Use block attributes where suitable to record information such as:
- Cabinet identification
- Module type
- Finish reference
- Hardware reference
This makes repeated drawings more consistent.
Autodesk’s official Create and Insert Blocks documentation explains how blocks and attributes can be used to reuse geometry and store associated information.
A well-organized block library can be particularly useful when preparing multiple residential kitchen projects.
11. Preparing Drawing Sheets and Printing
Once the working drawings are complete, organize them into drawing sheets.
A modular kitchen documentation set may contain:
- Kitchen furniture layout
- Dimensioned kitchen plan
- Base cabinet elevation
- Wall cabinet elevation
- Tall-unit elevation
- Kitchen section
- Countertop detail
- Cabinet construction detail
- Electrical layout
- Plumbing layout
- Cabinet schedule
- Hardware schedule
- Material and finish schedule
Use AutoCAD Layouts to organize views, title blocks, annotations and printing information.
The final PDF should be checked for:
- Correct sheet size
- Appropriate drawing scale
- Readable dimensions
- Clear line weights
- Proper text size
- Correct page orientation
- Complete drawing references
12. Common Mistakes in Modular Kitchen Working Drawings
Beginners should avoid these mistakes.
1. Working Without Actual Site Measurements
Incorrect room dimensions can affect the entire kitchen layout.
2. Ignoring Appliance Specifications
Appliances require specific installation spaces and clearances.
3. Missing Cabinet Identification
Every cabinet should have a clear reference that connects the plan, elevation and schedule.
4. Incorrect Countertop and Cabinet Details
The relationship between the carcass, countertop, backsplash and wall finish should be clearly communicated.
5. Ignoring Plumbing and Electrical Points
Service connections should be planned before finalizing cabinet dimensions.
6. Missing Sections
Some construction information cannot be understood through plans and elevations alone.
7. Inconsistent Dimensions
Check that overall dimensions and individual cabinet dimensions agree.
8. Missing Hardware Information
The selected hinge, drawer runner and lift mechanism may affect the cabinet construction.
9. Incomplete Drawing Sheets
A drawing package should contain the necessary details for the intended project stage.
10. Treating a Concept Render as a Fabrication Drawing
A 3D image is useful for presentation, but manufacturers need properly dimensioned technical information.
13. Practical Modular Kitchen Projects for Interior Design Students
Students can develop useful skills through complete project exercises.
Project 1: Straight Modular Kitchen
Prepare:
- Kitchen floor plan
- Cabinet layout
- Front elevation
- Side section
- Cabinet schedule
- Electrical and plumbing references
Project 2: L-Shaped Modular Kitchen
Prepare:
- Site measurement plan
- Furniture layout
- Two cabinet elevations
- Corner cabinet details
- Countertop details
- Hardware schedule
Project 3: U-Shaped Modular Kitchen
Prepare:
- Three-side cabinet arrangement
- Overall dimensions
- Cabinet elevations
- Sections
- Appliance locations
- Service coordination
Project 4: Modular Kitchen with Tall Units
Prepare:
- Refrigerator unit
- Oven and microwave unit
- Pantry storage
- Cabinet elevations
- Internal cabinet sections
- Appliance opening details
Project 5: Complete Residential Interior Project
Develop a complete residential interior drawing package containing:
- Living room furniture layout
- Bedroom furniture layout
- Modular kitchen
- Wardrobe details
- False ceiling plan
- Lighting layout
- Electrical layout
- Furniture elevations
- Material schedule
- 3D visualization
These projects can help students build a portfolio that demonstrates practical interior drafting and furniture detailing skills.
14. From AutoCAD Drawings to 3D Interior Visualization
Technical working drawings and 3D visualization serve different purposes.
AutoCAD helps prepare accurate 2D documentation, while 3D modelling and rendering tools help communicate the appearance of the proposed kitchen.
A practical workflow can include:
Stage 1 – AutoCAD
Prepare floor plans, cabinet layouts, elevations, sections and technical details.
Stage 2 – SketchUp
Convert the approved layout into a 3D kitchen model.
Develop:
- Cabinet volumes
- Furniture components
- Countertops
- Wall finishes
- Kitchen accessories
- Spatial arrangements
Stage 3 – 3ds Max and Rendering
Develop more detailed models and prepare presentation images using suitable materials, lighting, cameras and rendering settings.
Stage 4 – Final Presentation
Prepare:
- 3D kitchen views
- Material references
- Colour combinations
- Design presentation boards
- Technical drawing package
Students can explore Interior SketchUp Course Training in Yelahanka and Interior 3ds Max Course Training in Yelahanka to understand the 3D modelling and visualization side of interior design.
15. Career Opportunities After AutoCAD Interior Design Training
Practical interior drafting and modular kitchen documentation skills can support preparation for different design-industry roles.
1. Interior CAD Designer
Prepares 2D interior layouts, furniture drawings, elevations and technical details.
2. Modular Kitchen Design Assistant
Supports kitchen planning, cabinet layouts, elevations, dimensions and documentation.
3. Interior Working Drawing Designer
Prepares detailed drawings for furniture, ceilings, electrical layouts and interior components.
4. Furniture Detailer
Develops furniture drawings, sections, cabinet details and component information.
5. Junior Interior Designer
Supports interior design projects through planning, drafting, material selection and presentation.
6. 3D Interior Visualizer
Develops 3D interior models and rendering presentations.
7. Interior Design Project Coordinator
Supports coordination between designers, clients, contractors and execution teams.
Skills That Improve Career Readiness
In addition to AutoCAD, develop knowledge of:
- Interior design fundamentals
- Space planning
- Furniture dimensions
- Building materials
- Modular cabinet construction
- Hardware and fittings
- Electrical and plumbing coordination
- Drawing interpretation
- 3D visualization
- Client presentation
Career opportunities depend on technical ability, educational background, portfolio quality, experience and employer requirements.
Software training alone does not guarantee employment or qualify someone to independently provide regulated professional services.
16. Interior Design and AutoCAD Training in Yelahanka, Bangalore at EduCADD Centre
Are you searching for:
- AutoCAD interior design course in Yelahanka?
- Modular kitchen design training in Bangalore?
- Interior working drawing course near me?
- Interior design software classes in Yelahanka New Town?
- AutoCAD furniture drawing training?
- SketchUp and V-Ray training in Bangalore?
- 3D interior design courses in North Bangalore?
- Interior design course with placement assistance?
- Modular kitchen drawing and design training?
EduCADD Centre Yelahanka offers Interior Design software training for students, graduates, aspiring designers, architects, civil engineering students, freelancers and working professionals.
With 27+ years of experience, EduCADD Centre focuses on practical software education, interior design projects and career-oriented skill development.
The published Interior Design course includes:
AutoCAD Interior
- 2D drafting
- Floor plan creation
- Furniture layouts
- Electrical layouts
- False ceiling layouts
- Interior working drawings
- Furniture detailing
SketchUp
- 3D space modelling
- Furniture modelling
- Modular kitchen modelling
- Interior visualization
- Material selection
- Design presentation
3ds Max
- 3D interior modelling
- Furniture modelling
- Materials and textures
- Interior lighting
- Rendering
- Walkthrough basics
V-Ray
- Material enhancement
- Lighting effects
- Realistic rendering
- Presentation rendering
Lumion and Photoshop
- Interior walkthroughs
- Presentation enhancement
- Image editing
- Portfolio preparation
Explore the Interior Design Course in Yelahanka Bangalore at EduCADD Centre for published course details and syllabus information.
Students can contact the centre to confirm current batch availability, course combinations, software coverage, duration, fees and practical project arrangements.
EduCADD Centre provides practical project guidance, portfolio development support, resume preparation, interview preparation, career guidance and placement assistance for eligible students. Placement assistance does not guarantee a job or employment outcome.
Conclusion
Modular kitchen working drawings are an important part of professional interior design documentation.
Understanding kitchen layouts, cabinet planning, elevations, sections, dimensions, hardware schedules and service coordination helps interior designers communicate their ideas more effectively to manufacturers and execution teams.
Learning AutoCAD through practical modular kitchen projects can help students develop useful technical drafting and furniture documentation skills.
Combining 2D drafting with SketchUp and 3D visualization tools can further strengthen an interior design portfolio.
If you want to develop practical interior drafting, modular kitchen design and 3D visualization skills, explore the Interior Design training options at EduCADD Centre Yelahanka, Bangalore.
Learn. Design. Draft. Visualize. Build your creative career with EduCADD Centre Yelahanka.
Contact EduCADD Centre Yelahanka
27+ Years of Experience
Phone: 7411668249
Email: yelahanka@educadd.net
Address: EduCADD Centre, 16th B Cross Road, 3rd Phase, Near Bus Stop, Yelahanka New Town, Bangalore – 560064
Website: https://www.educaddcentre.in
EduCADD Centre – Leaders Through Quality Education.